Running PowerShell scripts on Windows startup can automate essential tasks and save time.
This article will discuss using Windows Task Scheduler to execute PowerShell scripts automatically at system startup.
Step 1: Create the PowerShell Script and Save it
A PowerShell script is a .ps1 file containing PowerShell code. In our example, we will use create_file.ps1 file with the following content.
|
1 2 3 |
$timestamp = Get-Date -Format "yyyy-MM-dd HH:mm:ss" $file = "C:\Users\kipro\OneDrive\Desktop\output_time.txt" Add-Content -Path $file -Value $timestamp |
The code is used to write the current datetime into a text file on the Desktop. Every time we log in, the current datetime will be added to a new line in the output_time.txt file when we execute this script from Task Scheduler.
Once the PowerShell script is ready, save it and note the location where you saved it.
Note: You may need to test-run the script at this point to ensure that it contains no syntax errors in it.
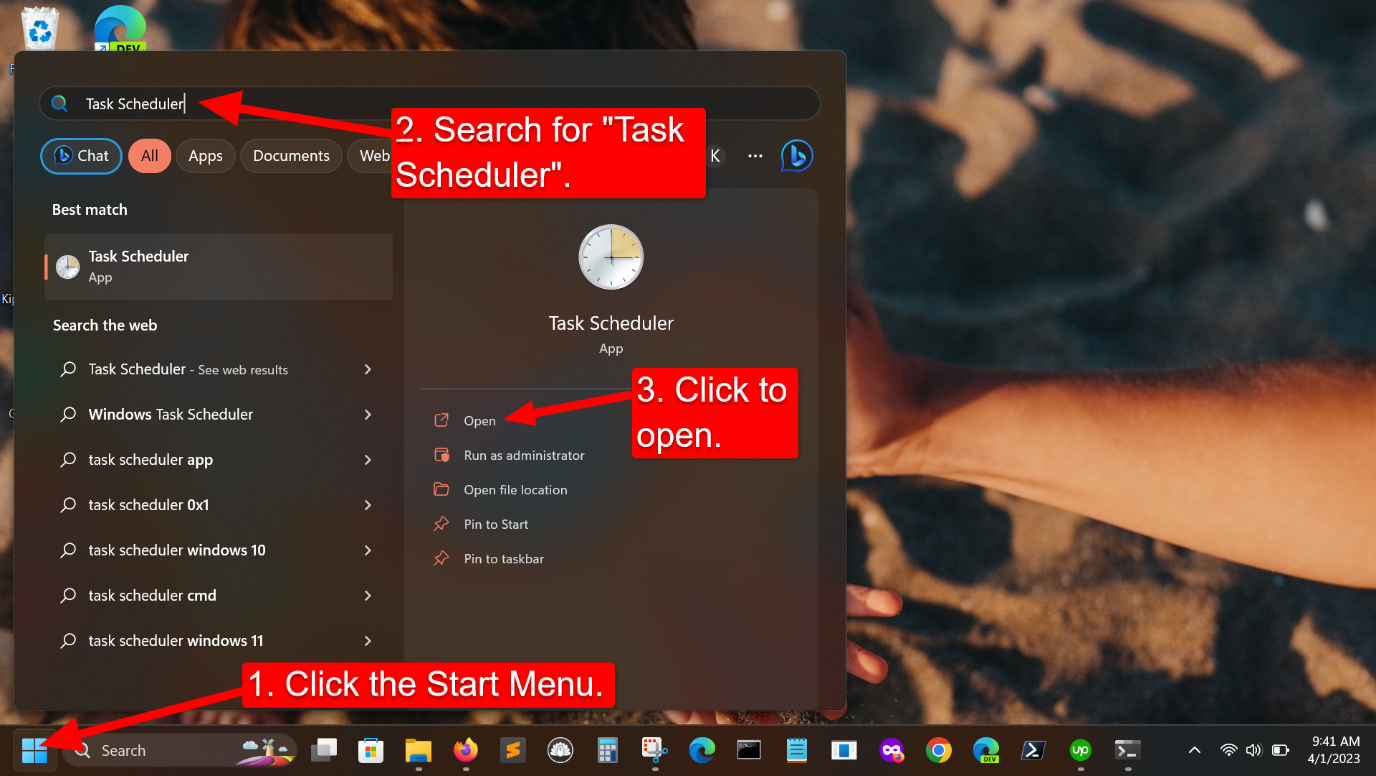
Step 2: Open Task Scheduler
Next, we need to open the Task Scheduler. You can do that in two ways:
- Search for it in the Start Menu or,
- Press Windows Key + R on the keyboard, type “taskschd.msc”, and hit ENTER.
The following Figure shows how to search for the Task Scheduler from the Start Menu.
Step 3: Create a New Task
In the Task Scheduler App, click “Task Scheduler Library” in the left pane, then click “Create Task” in the right pane to create a new task.
Step 4: Customize your New Task
After going through Step 3, you will land on a page like this with five tabs we can modify.
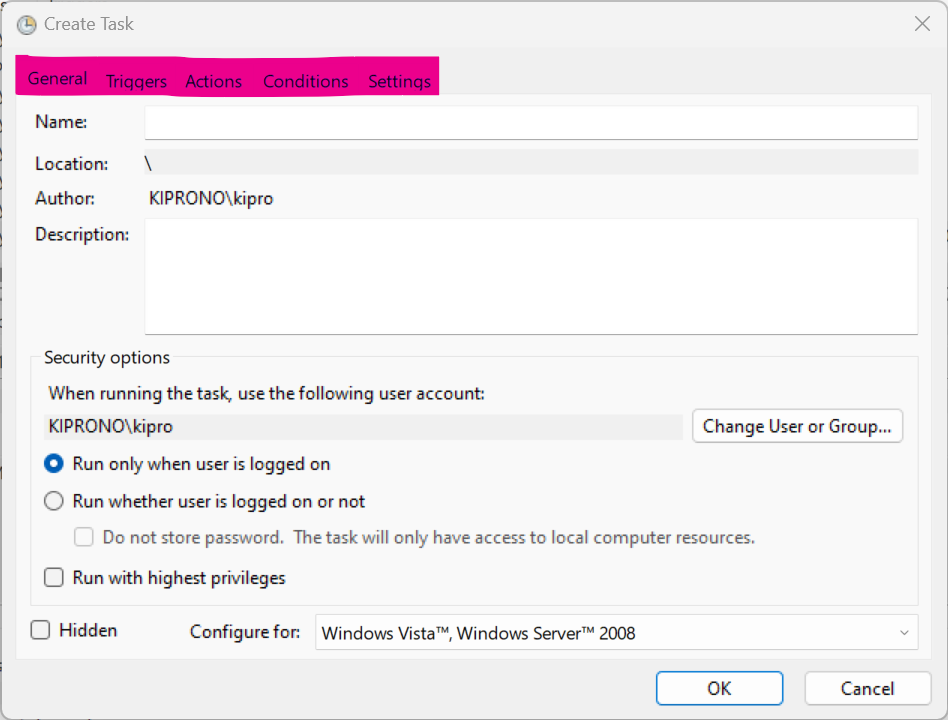
On the “General” tab
You need to provide the following information:
- Name: provide the name of your task,
- Description: a brief description of what the task will do,
- Security options: You can choose “Run whether user is logged on or not” and check the “Run with highest privileges”. That allows the script to be executed with admin rights.
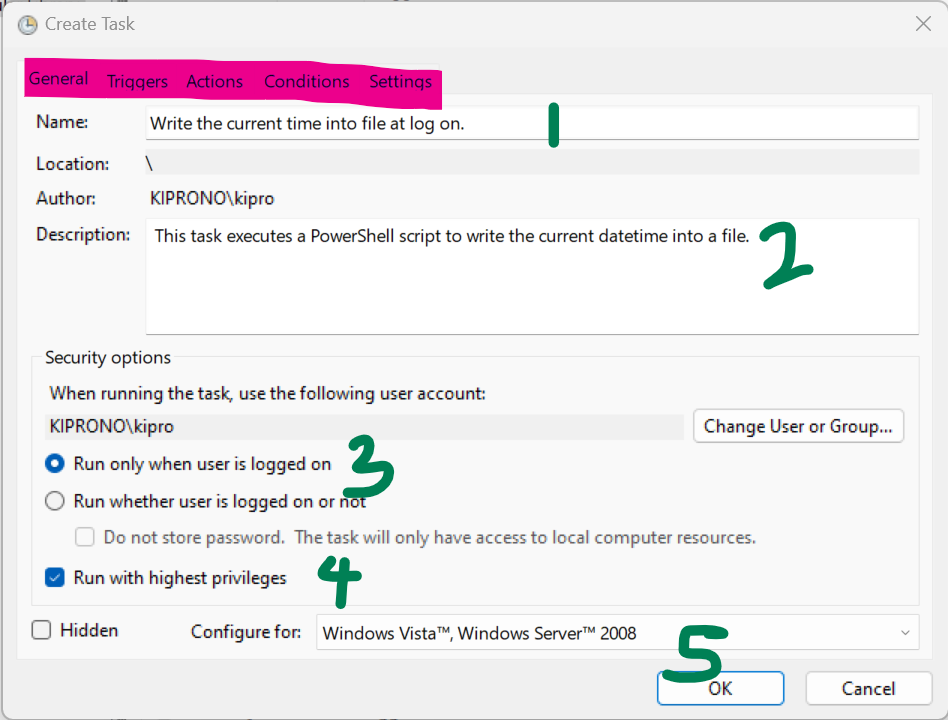
Once done, go to the “Triggers” tab.
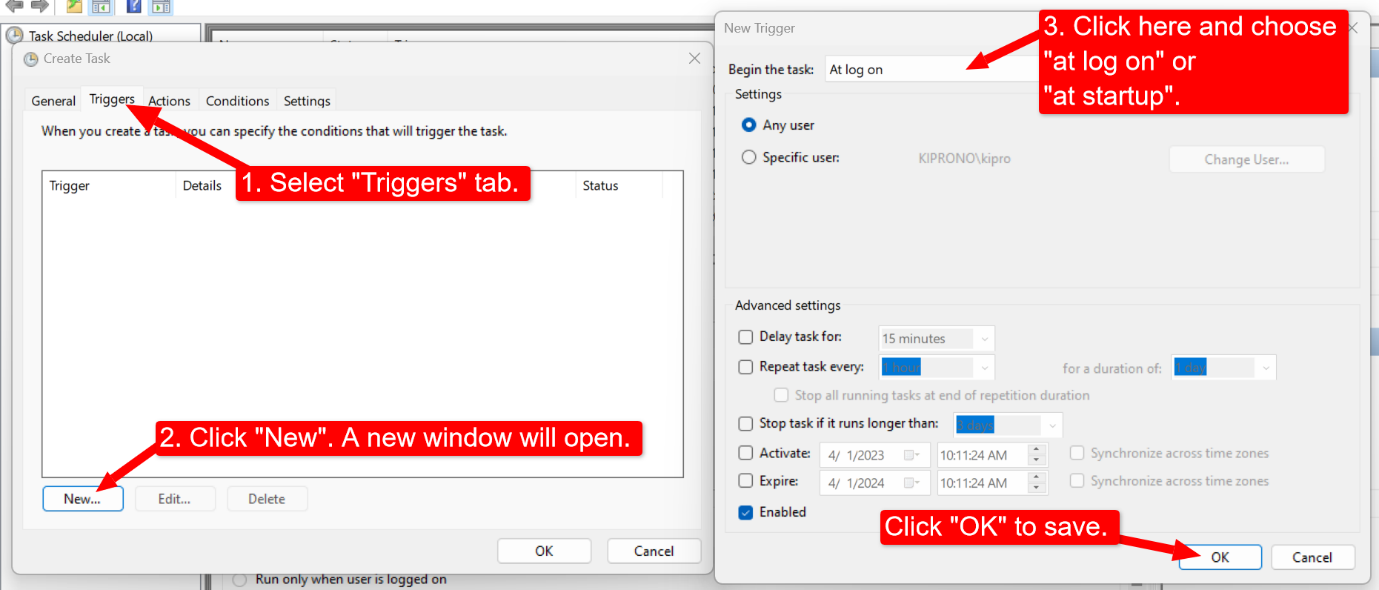
On the “Triggers” tab
Click “New” to create a new trigger for the task (a new window will be launched). Go to the new window, and select “at log on” or “at startup” as the trigger.
“At startup” means the task will run when the computer starts even before the user logs on, and “at log on” means that the task can only be executed when a specific user or any user logs on, depending on how you set it up.
On the “Actions” tab
On “Actions”, click “New” to create an action for the task (a new window will open). On the new window, under “Action”, select “Start a program”.
Then, under “Program/ script”, enter “powershell.exe”, and under “Add arguments”, enter the path to the PowerShell script you created in Step 1 (it is safer to provide a full path). In my case, the path is:
C:\Users\kipro\OneDrive\Desktop\create_file.ps1

On the “Conditions” tab
Some conditions in this tab may affect the execution of your script. For example,
The execution, by default, cannot be started if your computer is running on battery power (that is, not charging).
You can change that by unchecking the “Start the task only if the computer is on AC power”.
Step 5: Save the task and test it
Once you have completed Step 4, your task should be ready for deployment. Save it by clicking “OK”, then test it by logging out and back in to see if the script is executed automatically.