Adding a new column into a CSV boils down to these three steps:
- Load CSV file into a PowerShell Array using Import-Csv cmdlet,
- Add the new columns,
- (Optional) Export the result into a new or existing CSV file using the Export-Csv cmdlet.
In this article, we will consider several cases through examples. These cases include: adding a column with a default value, creating a new column with specified values, adding a column based on an already existing column, and lastly, joining two CSV files into one based on a given field.
In the majority of the examples, we will use “employees_names.csv” with the following data
FName,LName,Salary
Allan,Smith,3000
Lewis,Walker,5600
Deborah,Shawn,12100
Smith,Rowe,2800
Kael,Fernandez,7200
The Import-Csv Cmdlet
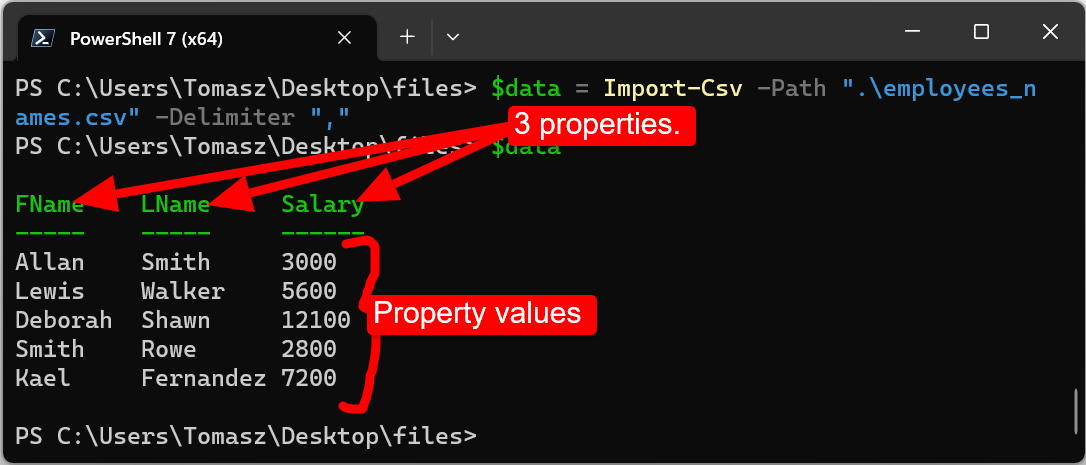
Import-Csv cmdlet loads CSV data into a table-like custom object. Each column in the CSV becomes a property of the custom object, and the row values become the property values.
The following code loads the “employees_names.csv” shown above.
|
1 2 |
$data = Import-Csv -Path ".\employees_names.csv" -Delimiter "," $data |
To create a column in a CSV, we will supply a new column/property name and provide property values using the Add-Member cmdlet, as shown in the following examples.
Example 1: Creating a New Column With a Specific Default Value
That can be achieved by running the following PowerShell code.
Script name: new_column_with_default.ps1
|
1 2 3 4 5 6 7 8 9 10 |
# Import a CSV file $data = Import-Csv -Path "employees_names.csv" # Add a new column called "Col1" with a "-99" value for all rows $data | ForEach-Object { $_ | Add-Member -MemberType NoteProperty -Name "Col1" -Value "-99" -Force } # Export the updated CSV data back to a CSV file (you can export to another file) # -NoTypeInformation prevents PowerShell from writing data type information # to the first row of the resulting CSV $data | Export-Csv -Path "employees_names.csv" -NoTypeInformation |
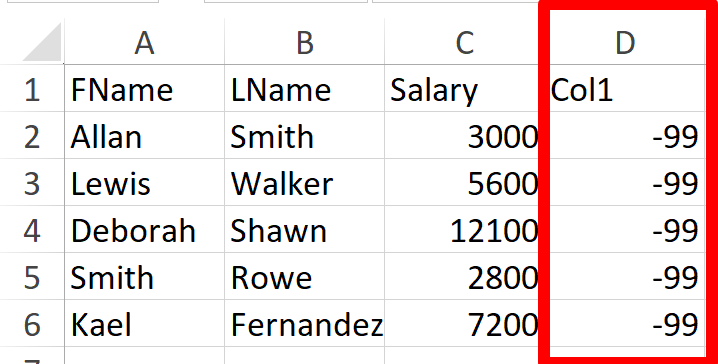
The code above creates a new column named “Col1” with -99 in all the rows. The -Force option is supplied if you want to overwrite an existing column.
Run PowerShell scripts by running the commands:
|
1 2 |
cd <path_to_folder_containing_the_script> .\script_name.ps1 |
After running the code above, “employees_names.csv” will look like this.
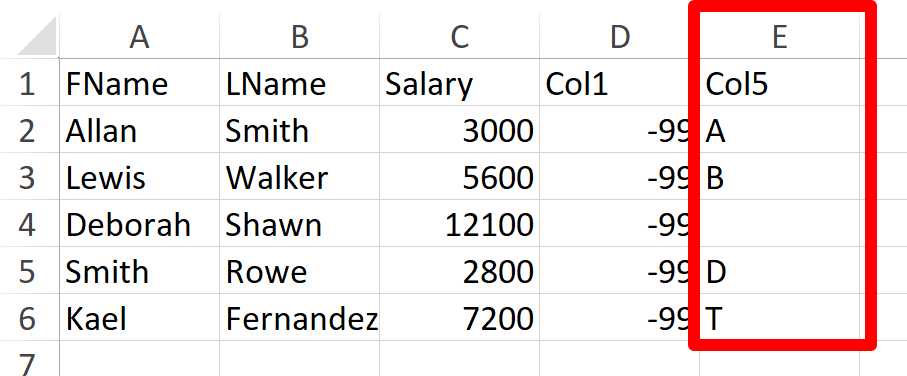
Example 2: A New Column With Values Issued by the User
This can be done with the code below.
|
1 2 3 4 5 6 7 8 9 |
# Define the values for the new column $newColumnValues = "A", "B", $null, "D", "T" # Load CSV file into a PowerShell array $data = Import-Csv -Path "employees_names.csv" # Add a new column to the object with values from the list # $rowNum = 0 means we start inserting from row 1, and $rowNum++ means one row at a time, 0, 1, 2, ... $data | ForEach-Object -Begin { $rowNum = 0 } { $_ | Add-Member -MemberType NoteProperty -Name "Col5" -Value $newColumnValues[$rowNum++] } # Export the updated object back to a CSV file $data | Export-Csv -Path "employees_names.csv" -NoTypeInformation |
When you run, the code above your CSV file will be updated as follows.
Example 3: Create Two Columns Based on an Existing Column
In this example, we want to create “Increment” and “NewSalary” columns where Increment = 0.11*Salary (11% of Salary) and NewSalary=Salary+Increment.
|
1 2 3 4 5 6 7 8 9 10 11 12 13 |
# Import the CSV file into a PowerShell object $data = Import-Csv -Path "employees_names.csv" # Add two new columns to the object $data | ForEach-Object { # convert Salary values into int $salary = [int]$_.Salary $increment = $salary * 0.11 $newSalary = $salary + $increment $_ | Add-Member -MemberType NoteProperty -Name "Increment" -Value $increment $_ | Add-Member -MemberType NoteProperty -Name "NewSalary" -Value $newSalary } # Export the updated object back to a CSV file $data | Export-Csv -Path "employees_names.csv" -NoTypeInformation |
Output:

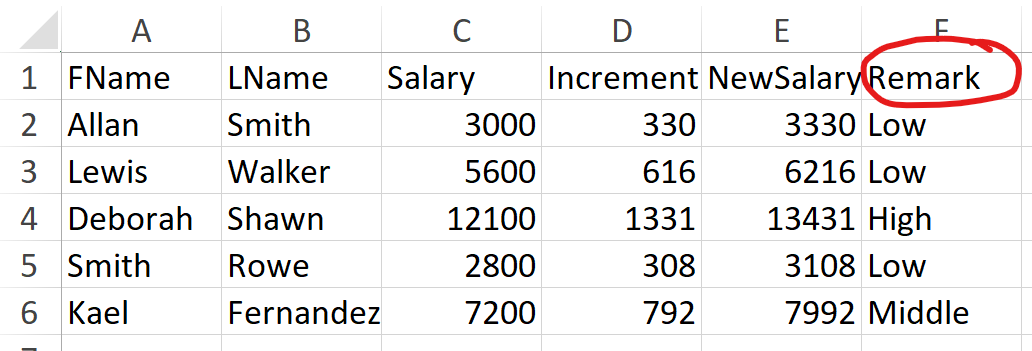
Example 4: Creating a Column Based on Another Using If-statement.
In this example, we create a ” Remark ” column based on the Salary column. If Salary>10000, then Remark = “High”; if Salary < 7000, then the Remark is “Low”; otherwise, the Remark is assigned the value “Middle”.
|
1 2 3 4 5 6 7 8 9 10 11 12 13 14 15 |
# Import the CSV file into a PowerShell object $data = Import-Csv -Path "employees_names.csv" # Add a new column conditional on $Salary $data | ForEach-Object { $salary = [int]$_.Salary if ($salary -gt 10000) { $_ | Add-Member -MemberType NoteProperty -Name "Remark" -Value "High" } elseif ($salary -lt 7000) { $_ | Add-Member -MemberType NoteProperty -Name "Remark" -Value "Low" } else { $_ | Add-Member -MemberType NoteProperty -Name "Remark" -Value "Middle" } } # Export the updated object back to a CSV file $data | Export-Csv -Path "employees_names.csv" -NoTypeInformation |
Output:
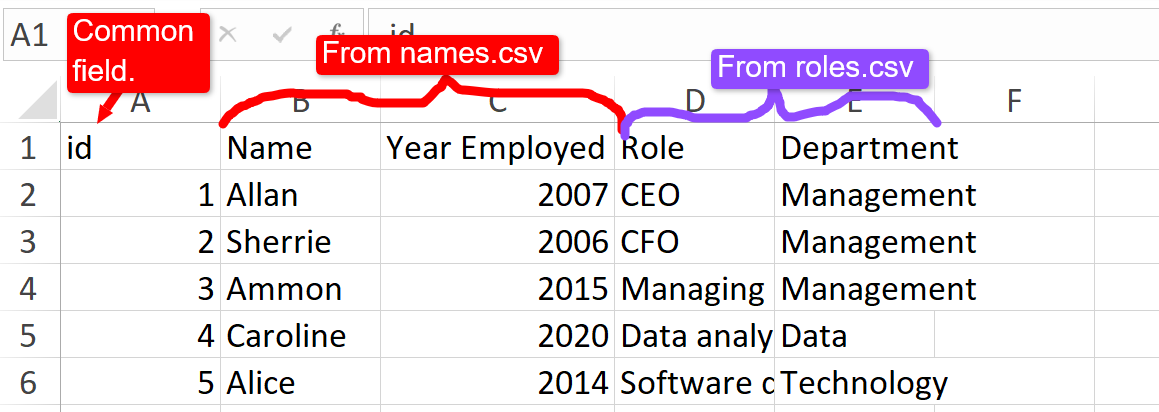
Example 5: Joining two CSV files
Given two CSV files, this example will use Join-Object to join the two files into one using a common column.
Join-Object doesn’t come pre-installed in PowerShell. You can install it by running the following command on PowerShell:
Install-Module -Name Join-Object
We will join two CSV files – names.csv and roles.csv with the following contents.
File name: names.csv
id,Name,Year Employed
1,Allan,2007
2,Sherrie,2006
3,Ammon,2015
4,Caroline,2020
5,Alice,2014
File name: roles.csv
id,Role,Department
1,CEO,Management
2,CFO,Management
3,Managing director,Management
4,Data analyst,Data
5,Software developer,Technology
Using the code below, we can join the two files above using the common column (id).
|
1 2 3 4 5 6 7 |
# Import the CSV files using Import-Csv cmdlet $names = Import-Csv -Path "names.csv" $roles = Import-Csv -Path "roles.csv" # Join the two CSV files on the "id" column $combined = Join-Object -Left $names -Right $roles -LeftJoinProperty "id" -RightJoinProperty "id" # Export the joined data to a new CSV file $combined | Export-Csv -Path "names_roles_joined.csv" -NoTypeInformation |
And the result is as follows:
After going through the guide above, you should be able to create columns on CSV using PowerShell easily.