With PowerShell, you can export data to CSV using the Export-CSV cmdlet. It creates a CSV file of the object you submit. It’s really useful for admins. Instead of using Excel, you can quickly run a PowerShell script to create CSV files.
Since the CSV file is a comma-separated text containing rows of data, you could technically use the command called Set-Content, to do this job. But using this command will require you to build the CSV structure yourself. Using Expert-CSV is just easier to use for this task.
This cmdlet understands, reads, and transforms data into the CSV structure.
Before you start writing commands in PowerShell, you have to open it with admin privileges.
Export variable to CSV
The simplest way to export a variable to a CSV file is to use the following code:
|
1 2 3 |
New-Object -TypeName PSCustomObject -Property @{ myVar = 123 } | Export-Csv -Path D:/Scripts/myVar.csv |
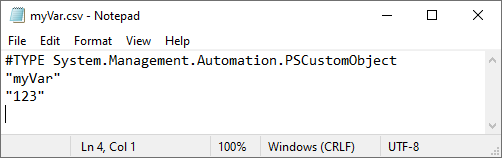
It’s going to create a file with the name of a variable, but also a value. If you open it in the text editor, the data is going to look like this:
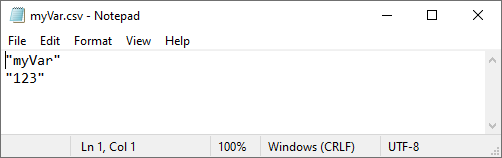
If you don’t want the first line to be visible, you can add the parameter called NoTypeInformation:
|
1 2 3 |
New-Object -TypeName PSCustomObject -Property @{ myVar = 123 } | Export-Csv -Path D:/Scripts/myVar.csv -NoTypeInformation |
This is the result:
You can open the file in Excel. If you didn’t change the delimiter, it will look like this:

It has a header and a value.
Let’s try to export more variables:
|
1 2 3 4 5 |
New-Object -TypeName PSCustomObject -Property @{ myVar1 = 123 myVar2 = 321 myText = "This is text" } | Export-Csv -Path D:/Scripts/myVars.csv |
If you add more variables, each value will be separated by a comma, which is the default delimiter.

It has three headers and a value assigned to each of them.
As you can see, the values are not in the same order as the defined variables.
Exporting a variable in two lines
So far, we created a property that was exported to CSV. All of that is in a single line. Now, let’s create a variable first and then export it to a CSV file.
|
1 2 |
$myObject = [pscustomobject]@{'myVar1' = 123; 'myVar2' = 321; 'myText' = "This is text"} $myObject | Export-Csv -Path D:\Scripts\TestObject.csv -NoTypeInformation |
There are three properties: myVar1, myVar2, and myText. Each of these properties has an assigned value. All of them are assigned to $myObject.
If you execute the command, it’s going to create the following file:
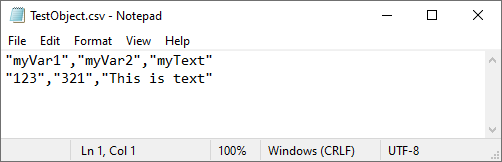
The PSCustomObject allows you to have a simple way to create structured data.
Define the delimiter
Sometimes, you may find yourself in a situation where you have to create a file that doesn’t use the default separator (comma) to separate fields.
Instead, you may need to create a file that uses tabs or semicolons as separators.
If you want, you can easily change a delimiter inside the command by adding the Delimiter property.
|
1 2 3 4 5 |
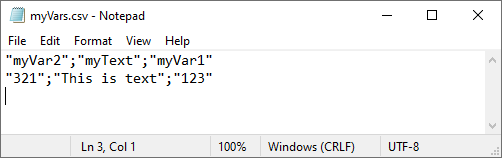
New-Object -TypeName PSCustomObject -Property @{ myVar1 = 123 myVar2 = 321 myText = "This is text" } | Export-Csv -Path D:/Scripts/myVars.csv -NoTypeInformation -Delimiter ';' |
Now, if you open the file, you’ll see that the delimiter changed.
For tabulators, your separator will look like this: Delimiter “`t” (character under tilde on the keyboard).
Appending rows
Normally, when you create a CSV file, it will override the previous one if it has the same name.
If you want to add new rows to a file, instead of overriding it, you can use the special -Append parameter.
After creating a file, execute the following command:
|
1 2 |
$myObject = [pscustomobject]@{'myVar1' = 456; 'myVar2' = 432; 'myText' = "This is text 2"} $myObject | Export-Csv -Path D:\Scripts\TestObject.csv -NoTypeInformation -Append |
If you open the file, it will look like this:
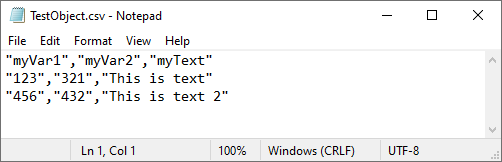
Headers are added only once, and additional values are appended as the next rows.
But what if you add an additional property, called myVar3 to the command and run it with the Append parameter? Let’s use this code:
|
1 2 |
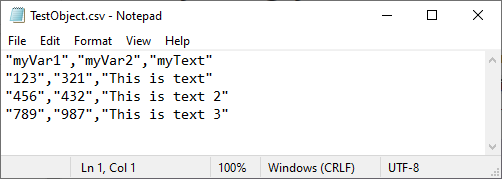
$myObject = [pscustomobject]@{'myVar1' = 789; 'myVar2' = 987; 'myVar3' = 111; 'myText' = "This is text 3"} $myObject | Export-Csv -Path D:\Scripts\TestObject.csv -NoTypeInformation -Append |
Now, if you open the file, you will notice that the additional property is simply ignored.
Export Excel worksheet to CSV
If you want to convert an Excel file to CSV in PowerShell, you can read more about it in the article on officetuts.net.